

In Part One of this three part tutorial, we trained a model using Azure’s Custom Vision platform to identify Solar Panels on rooftops using Vexcel’s Blue sky imagery. Here in part two we are going to work with disaster response imagery (aka graysky imagery) to identify buildings damaged in Wildfires.
The main difference here is that we will train the model on two tags, one representing buildings that have not been burned, and a second tag representing buildings that have been destroyed in the fire. Other than that, the steps are identical to what we did in Part One.
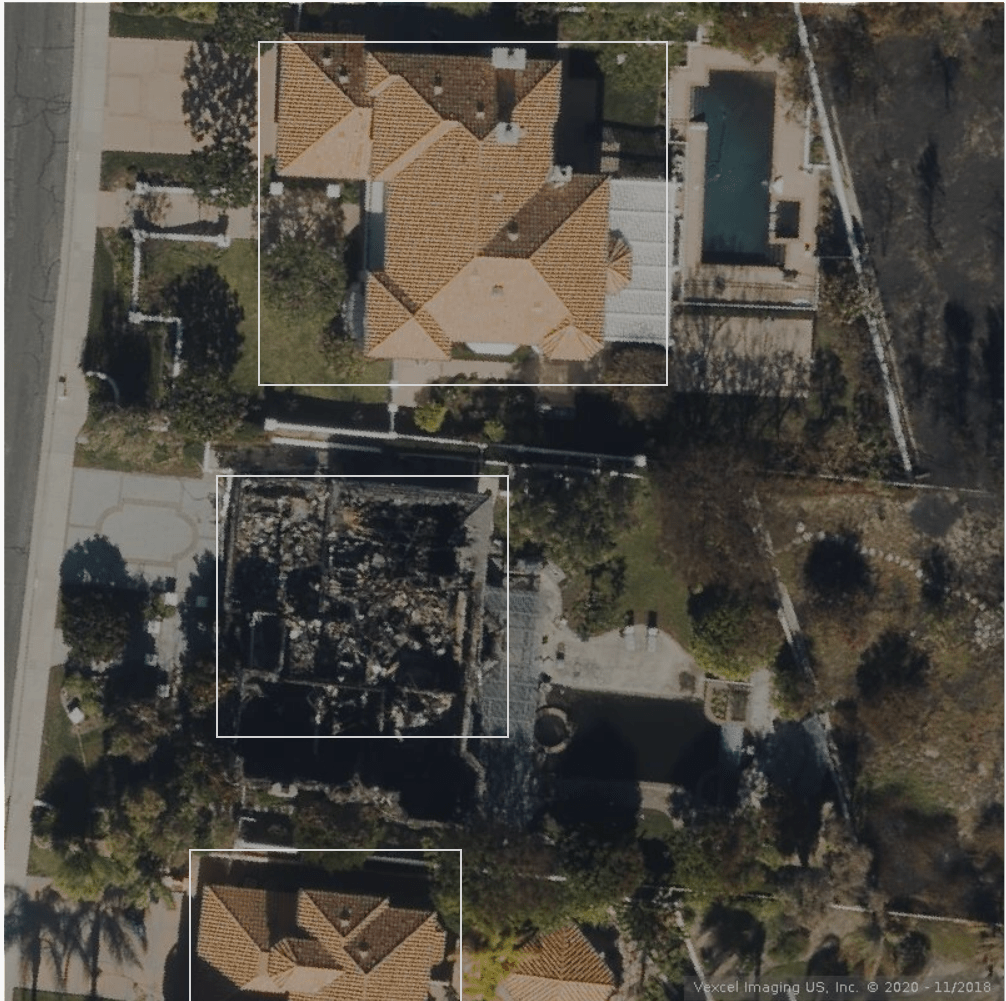
In this image you can see a good example of both tags that we will be training.
Step 1: Create a Custom Vision Account
If you completed part one of the tutorial, you’ve already setup your Custom Vision account and can proceed to step two below. But if you have not set up you Custom Vision account yet, Go back to part 1 of the previous tutorial to complete step 1 (account setup) then return here.
Step 2: Collect a bunch of images for tagging
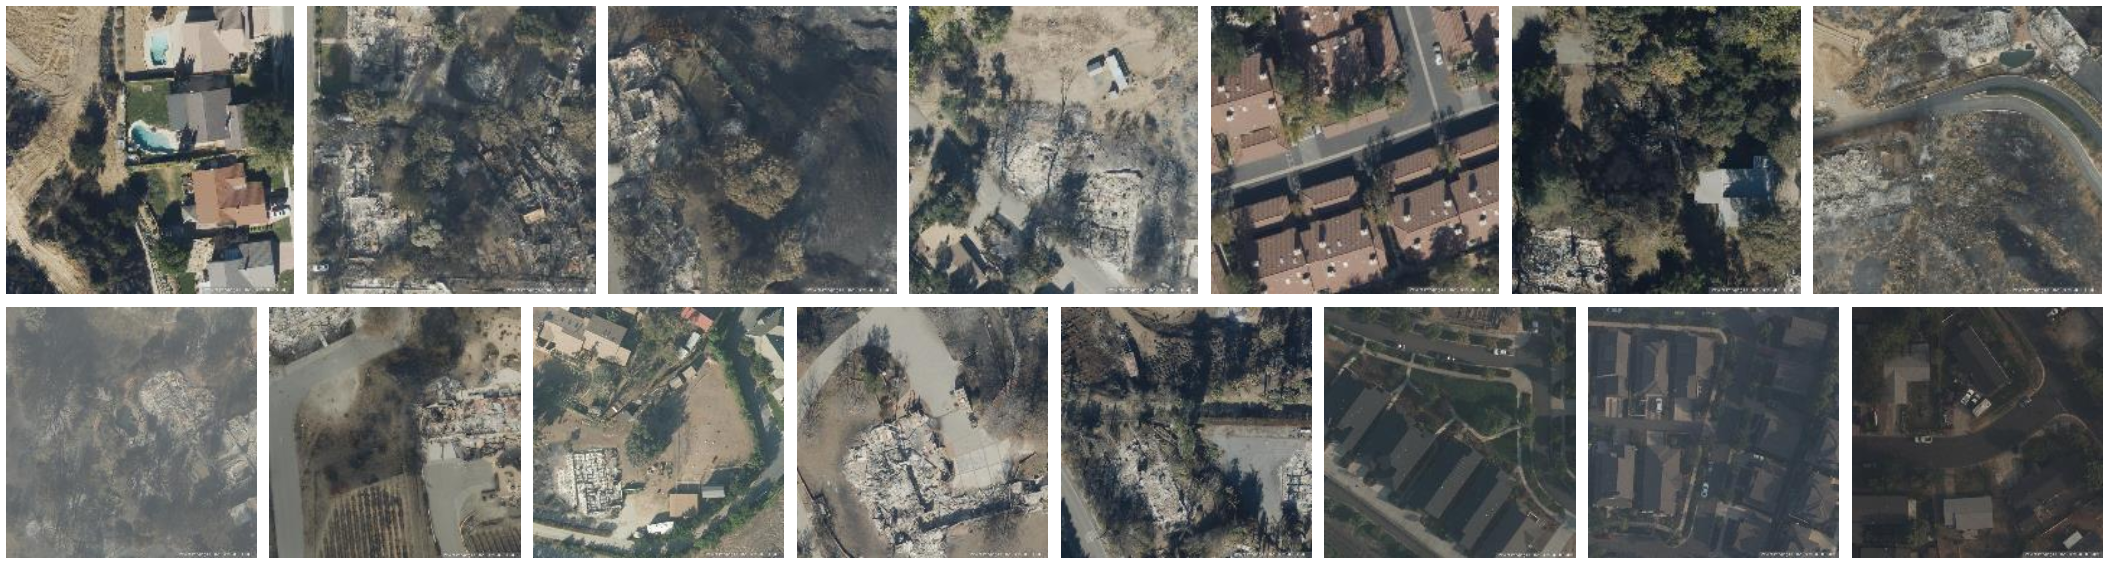
You’ll need to have 15 or more images of buildings NOT damaged by fire and 15 showing damaged buildings. Its important that both sets of images are pulled from the graysky data.
Create a folder on your local PC to save these images too. There are several ways you can create your images. One easy way is to use the GIC web application, browse the library in areas where there is wildfire imagery, then take a screen grab and save it to your new folder. Here are some coordinates to search for that will take you to areas with good wildfire coverage:
42.272824, -122.813898 Medford/Phoenix Oregon fires
47.227105, -117.471557 Malden, Washington fires
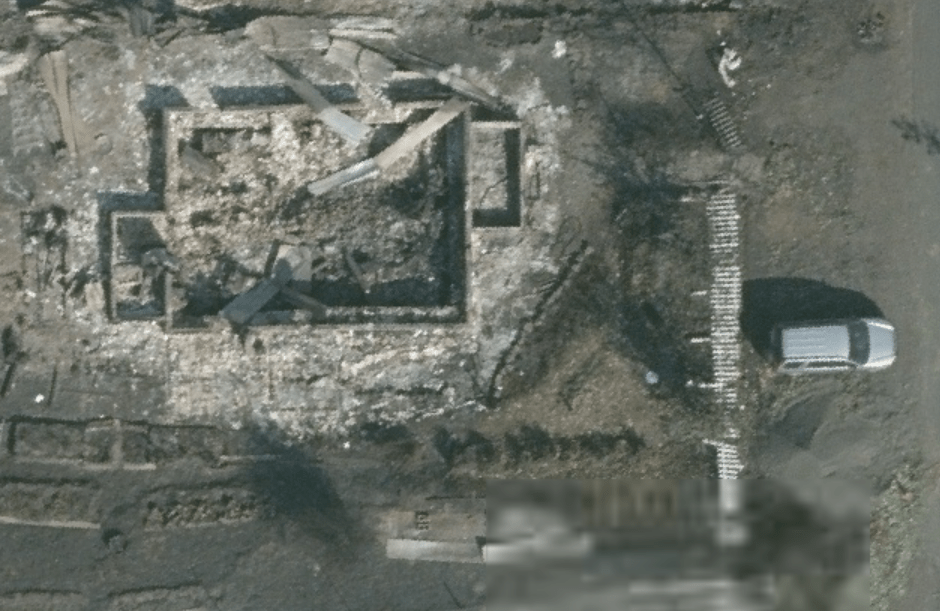
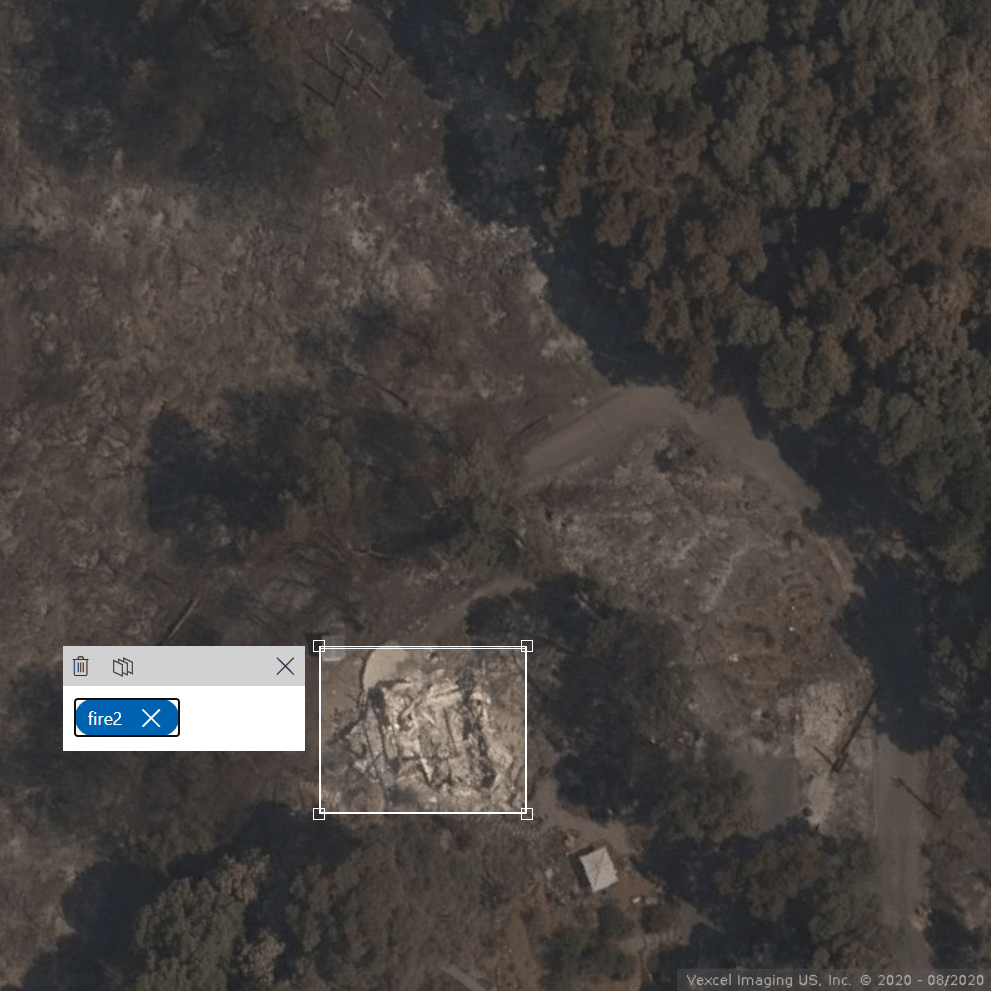
Here are two good representative images similar to what you are looking for. First an example of a destroyed building
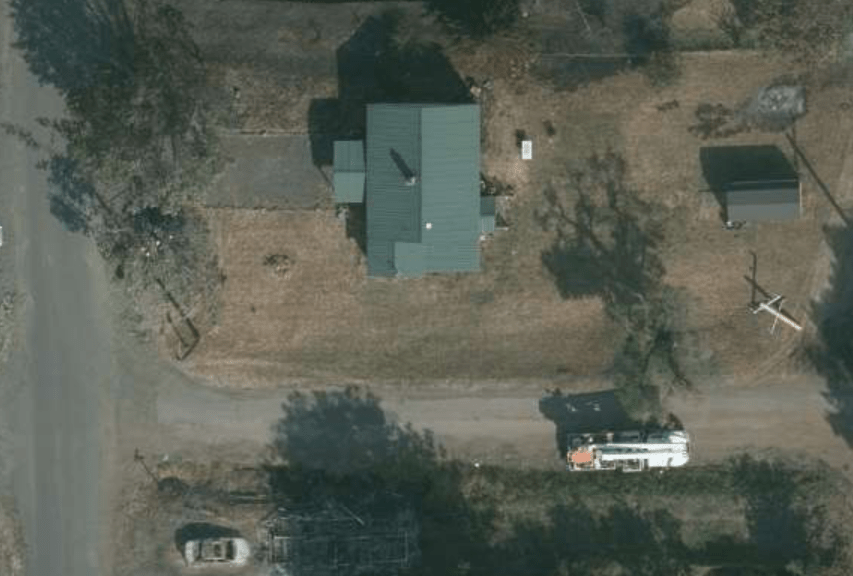
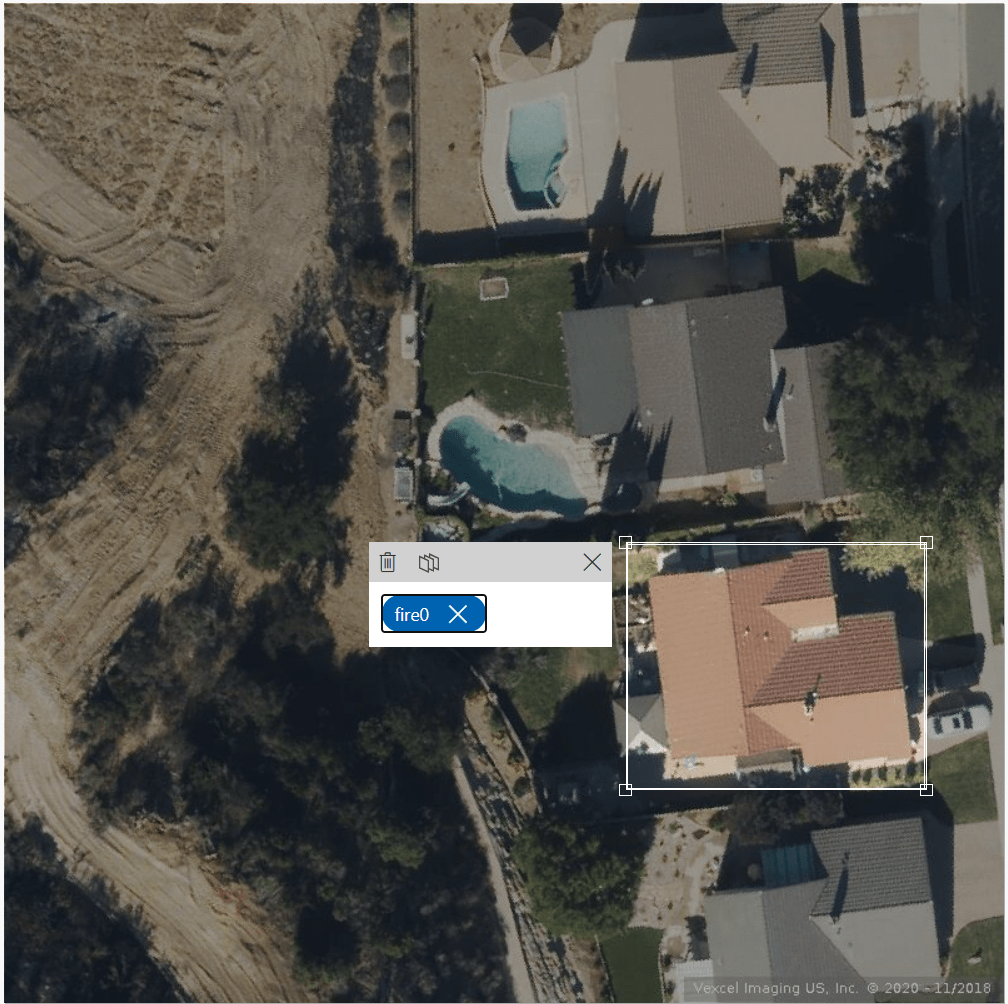
and an example of a structure still standing after the fire:
When you have 15 or more good examples of each in your folder, move on to the next step. Its time to tag our images!
Step 3: Create a new project in your Custom vision account
Return to your Custom vision account at https://www.customvision.ai/
Click the ‘New project’ button and fill in the form like this:
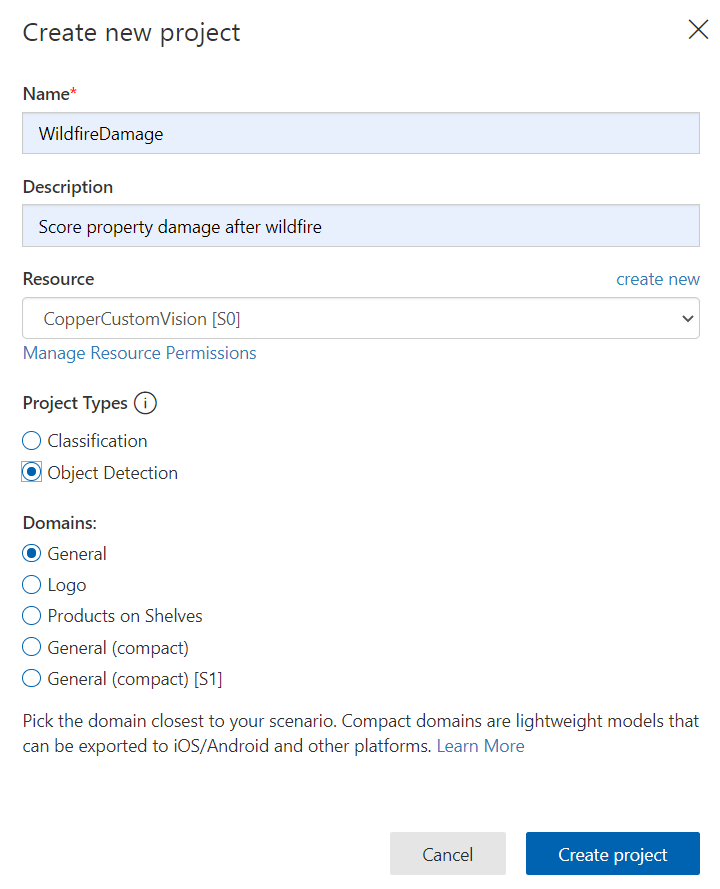
If this is your first project you’ll need to hit the ‘create new’ link for the Resource section. Otherwise you can select an existing Resource. Hit the ‘Create project’ button to complete the creation process. You now have a new empty project. In the next step we’ll import the images we created previously and tag them.
Step 4: Upload and Tag these images.
Your new empty project should look something like this:
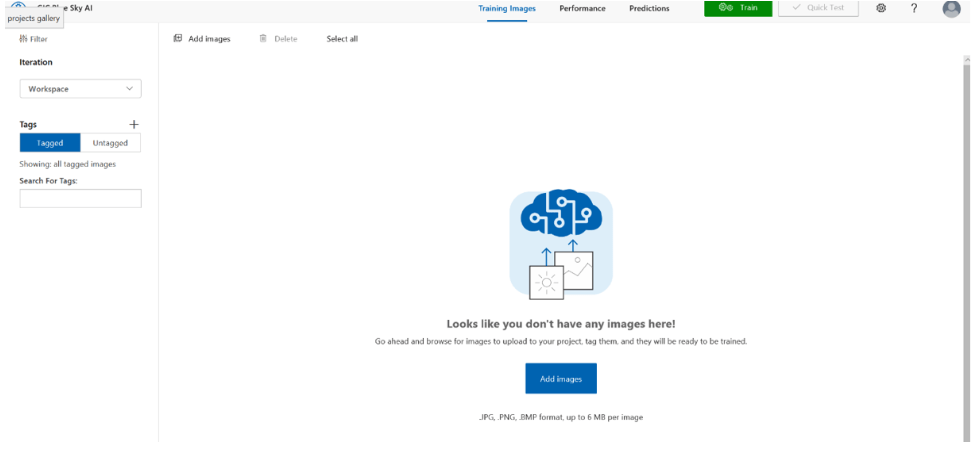
Hit the ‘Add Images’ button and import all of the images you saved earlier. You should see all of your untagged images in the interface like this:
Click on the first image of an undamaged property to begin the tagging process. Drag a box around the building structure. Its OK to leave a little buffer, but try to be as tight as possible to the building footprint. Enter a new tag name like ‘firenotdamaged’ And hit enter. If your image contains more than one structure, you can tag more than one per image.
Next choose an image with a building destroyed by fire and tag it in the same manner giving it a descriptive tag name like ‘firedamaged’.
Continue to click through all of your images and tag them. Some images might have a mix of burned and not burned structures. That’s OK, just tag them all appropriately.
Step 5: Train the model
If you click the ‘tagged’ button as highlighted below, you will see all the images you have tagged. You can click on any of them to edit the tags if needed. But if you are happy with your tags, its time to train your model!
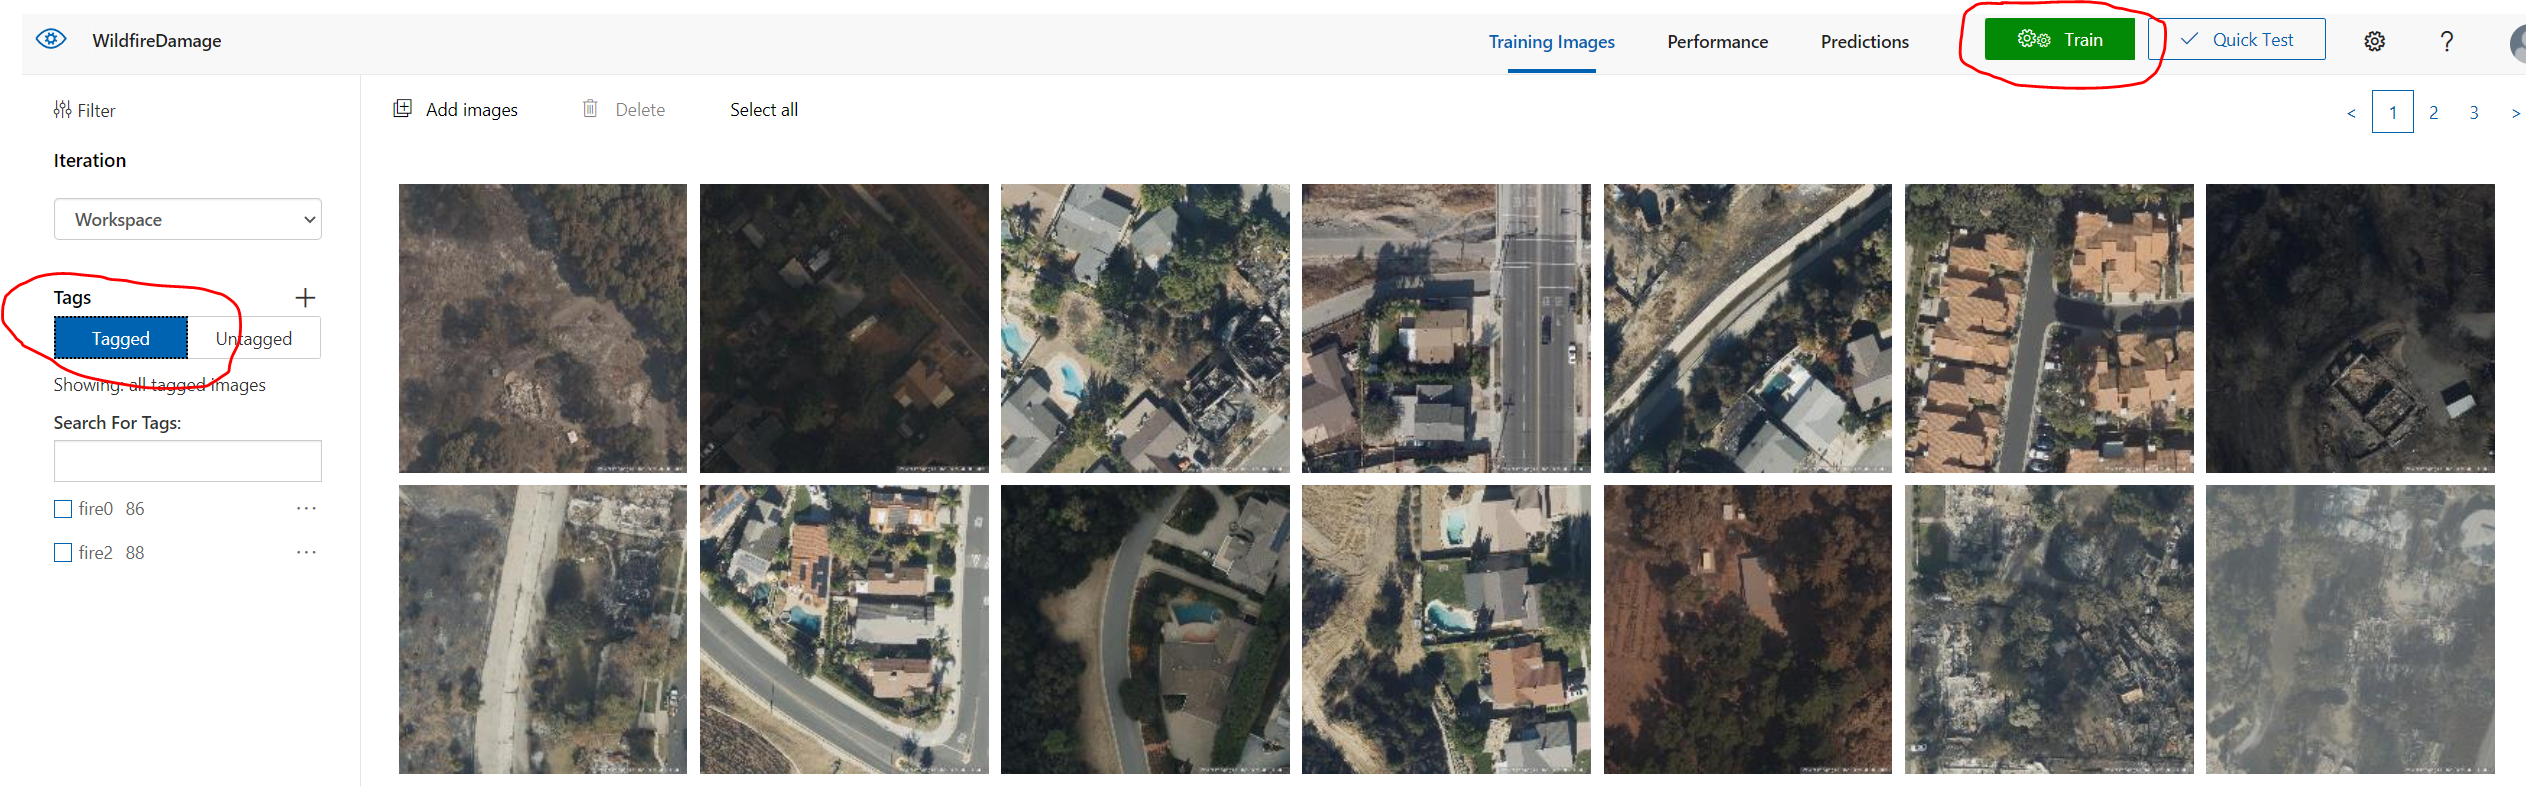
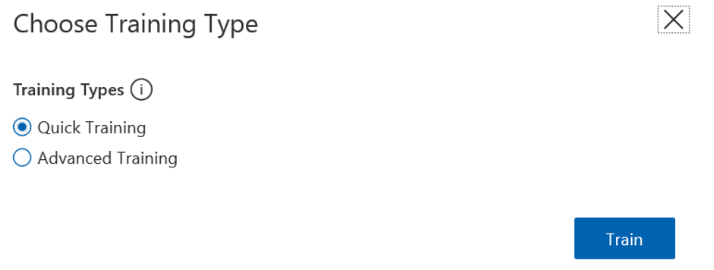
Hit the ‘Train’ button and select ‘quick training’ as your training type. Hit the ‘Train’ button to then kick off the training process. This will take around 5 minutes to complete, depending on how many images you have tagged.
Step 6: Test the model
When training completes, your screen will look something like this:
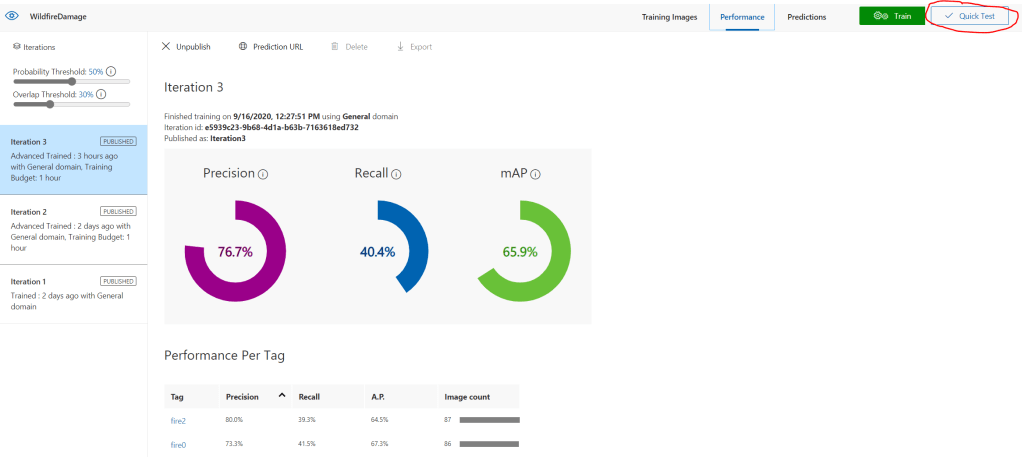
Its time to test your model! The easiest way to do so is with the ‘quick test’ button as highlighted above. Using one of the techniques used in step 2 to gather your images, go and grab a couple more and save them to the same folder. Grab a mix of buildings, some destroyed and some not.
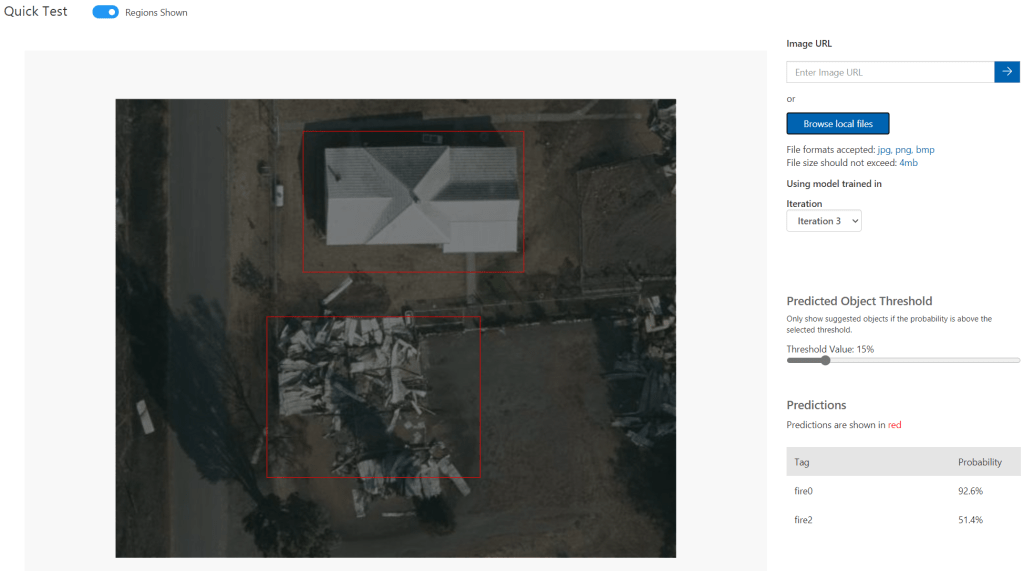
Hit the ‘Quick test’ link, and browse to select one of your new images. Here I selected an image that contained two adjacent structures, one destroyed and one not. You can see that both were correctly identified, although the probability on the burned building is a little low. this can be improved with tagging more images and retraining the model.
In Part three of this tutorial, we’ll use the API exposed by the Custom Vision Platform to build an app that can iterate through a list of properties and score each one
